Table of Contents
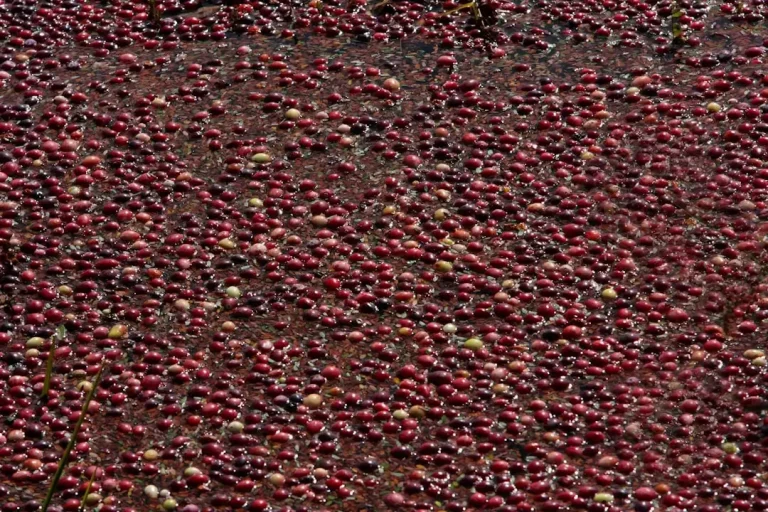
Don’t throw this black gold in the trash! Every year, millions of tons of coffee grounds are generated worldwide, with most of them ending up in landfills. Meanwhile, these inconspicuous remains of your morning espresso are a real treasure for your garden, home, and skin. In the spirit of zero waste, we have prepared a list of 10 proven, eco-friendly methods to reuse coffee grounds that will save you money and help protect the planet.
Eco-Friendly Hacks: A Quick Summary of Methods
Wondering how to easily reuse daily waste and natural ingredients to make your life easier? We have put together a clear summary of simple, eco-friendly methods that will help you instantly match the best solution to your current needs in the home, garden, or bathroom.
| Method | Key Differentiator (Key differentiator) | Category (Garden/Home/Beauty) | Difficulty Level |
|---|---|---|---|
| Fertilizer | Naturally nourishes soil with nitrogen and phosphorus | Garden | Very easy |
| Scrub | Effectively exfoliates dead skin without microplastics | Beauty | Very easy |
| Odor Absorber | Instantly neutralizes unpleasant odors in the fridge | Home | Very easy |
| Scouring Pots | Safely removes burnt-on food without scratching surfaces | Home | Easy |
| Repellent | Safely repels snails and ants | Garden | Easy |
| Mulching | Retains soil moisture and suppresses weeds | Garden | Medium |
| Dye | Allows dyeing fabrics in warm, earthy tones | Home | Medium |
| Ice Melting | Eco-friendly alternative to road salt, safe for dog paws | Home | Easy |
| Unclogging Drains | Dissolves clogs without toxic detergents | Home | Easy |
| Candle | Creates a cozy atmosphere and smells great without chemicals | Home | Medium |
The Big World of Innovation, or How Science Makes Our Lives Easier
Do you sometimes think that eco-friendly hacks are solely the domain of home DIYers? Nothing could be further from the truth! A real revolution is happening right now in laboratories, and upgrading daily processes is big business. We feel like scientists are truly bending over backward to make sustainable living easier for us. Examples? Over a third of environmental patents concern clean energy. That’s a major step forward. Seriously!
Besides, green changes are also highly visible in our shopping baskets. Biodegradable packaging is slowly replacing traditional plastic. According to the authors of EkoTechnik in their summary of interesting eco-patents, the recycling industry is recording a nearly nine percent increase in patent applications for modern, plant-based raw materials. By the way, it’s amazing how quickly we can replace petroleum with common corn or sugarcane. The future has probably never looked so exciting.
1. Natural Acid-Loving Fertilizer for the Garden
Did you know that your morning coffee brewing ritual can also bring lots of joy to your garden plants? Coffee grounds are real gold that is too good to simply throw in the trash. They are naturally rich in nitrogen, phosphorus, and potassium—exactly what green tigers love most. These nutrients give plants a solid growth boost and enhance their colors beautifully. We get the feeling that heathers, azaleas, ferns, or rhododendrons will absolutely go crazy for them! Coffee grounds work wonderfully as a gentle acidifying agent, bringing soil pH closer to their favorite acidic level.
- Best for: Nourishing and acidifying the soil for acid-loving plants
- Cost: $0
- Difficulty: Very easy
Liquid Cocktail or Loose Mix? Choose Your Method
How do you do this in practice? It’s incredibly simple. You can prepare an instant liquid fertilizer for watering. Just pour one cup (about 150 grams) of dry coffee grounds into a bucket and add 10 liters of water—preferably settled water or rainwater. Mix it up, leave it for 6 to 12 hours, and it’s ready! Water directly at the root to avoid getting the leaves wet. Use this homemade formula once or twice a month during the growing season.

And if you prefer simpler solutions, just mix the dried coffee grounds directly with the soil at a depth of about 15–20 centimeters when planting. They will loosen the soil, improve its aeration, and do a fantastic job. Just remember one crucial thing: though coffee works wonders, absolutely do not use it on lavender, boxwoods, or other plants that love alkaline soil. A complete no-go, seriously! We don’t want to harm them. The importance of avoiding such mistakes when growing is highlighted in the guide by Dandelion.pl. Beautiful, lush growth, after all, starts with tailoring the diet to the specific needs of your green roommates.
2. Firming Body Scrub to Combat Cellulite
We all have those days when our skin looks a bit dull and lacking in energy. Instead of running to the store for expensive products in plastic packaging, we suggest a quick trip to the kitchen. We love simple, homemade solutions—a coffee scrub is an absolute classic that can work minor wonders. It smells incredible and actually allows us to recycle what would otherwise end up in the trash. Have you heard of this hack?
Here is a quick cheat sheet on why you should give it a try:
- Best for: Smoothing skin and reducing the appearance of cellulite
- Cost: Very low (pennies for oil and cinnamon)
- Difficulty: Medium (requires mixing ingredients)
Wystarczy chwila wolnego czasu, by wyczarować kosmetyk o konsystencji, która idealnie masuje ciało. Dodatek rozgrzewającego cynamonu i odżywczego oleju kokosowego sprawia, że łazienka w mig zamienia się w przytulny salon odnowy biologicznej. Chyba nie ma przyjemniejszego sposobu na wieczorny relaks!

Proportions and a Double Punch to Cellulite
A quick recipe for the perfect mix? Prepare 3–4 tablespoons of dry coffee grounds, 2–3 tablespoons of liquid coconut oil, and a pinch (about 1/4 teaspoon) of ground cinnamon. Simply mix everything thoroughly in a small jar. This scrub acts on our skin in two ways. On one hand, the coffee grounds provide a brilliant mechanical effect—manually exfoliating rough, dead skin. This instantly makes your body silky smooth. On the other hand, we have pure biology at play. Caffeine penetrates into the epidermis, stimulates blood and lymph microcirculation, and gently promotes the breakdown of fat cells. Additionally, it helps drain excess water, which greatly reduces swelling.
By the way, we must be completely honest with you. No cosmetic—even one with the most natural ingredients—can resolve this on its own. While the scrub is amazing at improving skin elasticity and appearance, it won’t replace a balanced diet or regular walks and workouts. Think of it rather as great, firming support for an active lifestyle. As the helpful article on the coffee scrub on the Ubieramymamy.pl blog suggests, using it regularly 2–3 times a week yields the best visual results. Seriously, consistency makes the biggest difference here. We have a feeling your skin will quickly reward you with a healthy, radiant glow!
3. Unpleasant Odor Neutralizer for the Fridge
Know that moment when you open the fridge and are hit by the unpleasant aroma of yesterday’s dinner combined with mature cheese? Exactly. Instead of buying chemical-filled plastic air fresheners, make use of what was destined for the bin anyway. Morning espresso coffee grounds have amazing absorbent properties. Coffee acts literally like a natural magnet for aromas. In small, enclosed spaces, it can instantly “lock in” floating odors. We feel this is one of the easiest ways to streamline household life.
- Best for: Fridges, shoe cabinets, and wardrobe interiors
- Cost: $0
- Difficulty: Very easy
How to Prepare a Coffee Odor Absorber Step-by-Step
By the way, there is one super important rule when making this neutralizer. Moisture is enemy number one. Remember: if you put wet, fresh-from-the-machine coffee grounds into the fridge, they will mold within just a few days. And surely nobody wants to grow a brand new ecosystem next to the butter and vegetables? Seriously, drying them thoroughly is the basis of all success.
How to do it right? Spread the grounds in a thin layer on a plate or baking paper. Leave them in a dry, well-ventilated spot for several hours. If you’re in a hurry, you can heat them slightly in the oven. Once they are perfectly loose and dry to the touch, transfer them into a small jar without a lid or into a cotton bag. Place this package on a shelf. Similar natural methods of freshening up the home are highly popular—according to the authors of articles on Onet.pl, simple, eco-friendly solutions can completely replace store-bought air fresheners. Give it a try, your fridge will definitely thank you!
4. Gentle Scouring Detergent for Pots
Have you already gathered a solid supply of dark residue from your morning espresso? Great, because we have a brilliant use for it. Dried coffee grounds work in the kitchen like an entirely natural, eco-friendly scouring powder. Their slightly abrasive texture is excellent at removing dried food residue, and most importantly—it does so without scratching the cleaned surface. Seriously, you can easily forget about buying harsh chemical agents.
By the way, you can use this natural cleaner on its own on damp surfaces, or simply with a little standard dish soap. Want to take your eco-cleaning to the next level? As reported by Dom Wprost, mixing coffee remains with baking soda produces incredible results when cleaning metal surfaces. We feel that this simple mixture will save many a burnt pot!
How to Use Coffee Powder Safely?
Before you run off to battle dirty dishes, remember one important thing. Although coffee particles are quite soft, it’s best not to use them on highly delicate, scratch-prone Teflon coatings without first testing a small, inconspicuous area. Safety of our favorite pans comes first, right?
- Best for: Removing burnt food and residue from pots and pans
- Cost: $0
- Difficulty: Very easy
5. Protective Barrier Against Snails and Ants
- Best for: Protecting garden and patio plants from pests
- Cost: $0
- Difficulty: Easy
Having trouble with uninvited guests in your flowerbeds? Instead of running to the store for chemicals, just peek inside your espresso machine at the end of the day. The smell and texture of coffee are fantastic at telling ants, fruit flies, and slow-crawling snails to stay away. Seriously, these little creatures have exceptionally sensitive senses. For them, the intense aroma of coffee is a clear warning sign they prefer to avoid at all costs. Furthermore, the rough texture of the ground beans creates a nearly impassable barrier for mollusks. As a popular article on Dom Wprost points out, coffee grounds are highly effective as a clever home solution for troublesome garden pests.
How to Build an Effective Barrier Step-by-Step
The whole secret lies in the proper preparation of the material. Damp grounds will quickly mold in the flowerbeds, which we definitely don’t want. First, spread them out in a thin layer on a plate or baking paper and let them dry completely in the sun. Once they are perfectly crumbly, it’s time to act. Scatter them around the stems of vulnerable plants, forming a solid, closed line a few centimeters wide. This natural “fence” will hinder insect movement and protect delicate leaves from being nibbled.
We want to be completely honest with you. Although this method is brilliant, in the case of a massive invasion and a real pest plague, coffee alone won’t win this war. We feel like this is obvious, but it works primarily as great support and prevention. By the way, it’s an excellent excuse to enjoy another cup of coffee, isn’t it? Let’s care for our gardens naturally and with a smile.
6. Mulch That Retains Moisture
Do you dream of a garden that drinks less water but grows lushly? Us too! Instead of buying expensive protective formulas, look to the bottom of your morning cup. We love simple solutions like this. A thin layer of grounds protects against fast evaporation of water from the soil, acting like an ultra-economical, natural thermal blanket. Plants drink more slowly, and we save time otherwise spent carrying a watering can around. By the way, this is an excellent way to give a second life to household waste without spending a single penny.
- Best for: Ensuring proper soil moisture in the garden
- Cost: $0
- Difficulty: Easy
How to Prepare and Safely Apply Coffee Mulch?
The entire procedure is incredibly simple, but the devil is in the details. The most important rule? The grounds must be completely dry before spreading on the beds. Seriously, wet leftovers straight from the espresso machine are the quickest route to garden disaster. Damp grounds will quickly clump into a thick, impermeable crust. This compacted layer will completely cut off the supply of air to the roots and immediately get covered in mold.
How to do it right? Simply spread the wet grounds in a thin layer on a paper towel or tray and leave them in a warm spot for a few days. Once they are dry as sand, gently scatter them on the ground around the plants. Remember: moderation is key—we are aiming for a delicate, loose dusting, not a thick armor. As a practical mulching guide on Mały Ogród indicates, the optimal thickness of traditional organic mulch varies depending on the plant, but in the case of fine coffee grounds, it’s best to stick to a very thin layer (about 2 cm) while maintaining a safe distance from stems and trunks to avoid rotting.
Who Benefits Most from a Coffee Spa?
We get the feeling that coffee beans hold a certain magic, but not every plant shares this enthusiasm. Coffee grounds have a slightly acidic pH (in the range of 4.5–5.5). For this reason, this mulch will evoke genuine delight in acid-loving species. Hydrangeas, heathers, azaleas, or even blueberries will be thrilled. Avoid scattering grounds under plants that prefer calciferous, alkaline soil, however. Want to see how your shrubs react? This is probably the most pleasant, fully natural experiment you can run in your garden today.
7. Natural Eco-Friendly Dye for DIY
Who said painting and dyeing requires chemicals in plastic bottles? Exactly! Our daily morning espresso conceals amazing creative potential. The dark brown extract from coffee grounds beautifully dyes paper, natural fabrics (we are talking mainly linen and cotton here), and raw wood. It’s a wonderful, entirely safe activity for anyone who loves watching things take on a unique character at zero budget.
But before you throw yourself into a creative frenzy, we’ve prepared a brief technical summary of this eco-experiment. See for yourself how simple it is:
- Best for: Decorating paper (distressing/aging), dyeing clothes, and staining wood
- Cost: $0
- Difficulty: Medium
A Second Life for Grounds: The Recipe for a Homemade Concentrate
How do you squeeze the maximum color out of coffee remains? It’s easy! We need to brew them again, but in a much smaller amount of water, in order to get a truly strong, dark solution. We standardly recommend a ratio of one part dry grounds to about two or three parts water (for example, a portion of 100g of grounds to 200ml of water). Simmer it on low heat for about 30–60 minutes, then simply strain the liquid through a fine sieve or cheesecloth. If you dream of dyeing clothes, we have some important advice. Fabrics without an appropriate mordant, such as ordinary vinegar or salt added directly to the dye bath, will quickly lose their new shade. Seriously, without this step, the color will just wash out during the first laundry cycle. Besides, as WWF Poland highlights in its educational campaigns on sustainable fashion, natural textile dyeing requires proper care when stabilizing the pigment to enjoy it for longer.
What you can do with the finished liquid? There are plenty of options, and you’re limited only by your imagination. Distressing paper comes out brilliantly—just brush a bit of cooled liquid onto a regular sheet, and after a moment, it looks like it came out of an old pirate journal. Want more? Try tie-dyeing a cotton shopping bag. Simply tie it tightly with string in several places and toss it into the hot solution with vinegar. Meanwhile, raw wooden photo frames coated with this “coffee stain” will gain a beautiful, deep retro shade with a visible grain. It’s time for a quick closet clear-out and a creative afternoon, don’t you think?
8. Slip Prevention in Winter (Instead of Road Salt)
Who among us hasn’t taken a spectacular spill on an icy pavement right outside their own home? Exactly. In those moments, we usually automatically reach for road salt. But let’s face it—this isn’t a healthy option for our pets’ paws, nor for the residential plants that look miserable after winter due to salted soil. Fortunately, we have a true ally for special operations in our kitchen. Morning coffee grounds cope exceptionally well with winter ice, and they are completely safe for the environment.
We get the feeling that this is one of those brilliantly simple solutions that save the day without spending a penny. The rough, grainy texture of the particles instantly increases shoe grip on slippery surfaces. Pure physics at the service of safety! Besides, the dark, almost black color of the grounds acts like a natural sun magnet. It absorbs sunlight much better than light sand, which means a thin layer of ice melts noticeably faster. By the way, it’s an excellent way to recycle something that would normally end up in the waste bin.
Why Swap Sodium Chloride for Coffee Sprinkles?
Road salt is aggressively destructive. It ruins the grout in paving stones, accelerates corrosion, and simply causes concrete to crumble after a few seasons. On the other hand, our coffee alternative is incredibly gentle on the environment. It doesn’t salinate the ground, allowing the grass around paths to wake up in spring in great shape. What is extremely important for dog and cat owners—the soft pads of their paws won’t be exposed to the painful irritation and wounds that classic chemical salt so often causes.
Perhaps the only thing we absolutely must keep in mind is the type of surface. It’s better to avoid scattering damp grounds on light-colored, porous patio tiles or light granite steps, as they can cause permanent staining. However, they will work perfectly on dark concrete, asphalt, or classic gray paving blocks! Interestingly, as we read in the Deccoria.pl guide, the granular structure of coffee remains works beneath boots similarly to sand, creating a stable non-slip layer which, unlike salt, doesn’t destroy the shoe soles or car bodies.
- Best for: Scattering on icy steps and home paths
- Cost: $0
- Difficulty: Very easy
9. Unclogging and Cleaning Kitchen Pipes
Did you know that your morning coffee brewing ritual can have a surprising second life in the kitchen? Instead of throwing organic remains from your black coffee straight into the bio-waste bin, we can invite them to a natural home spa for our sink. Sounds unusual? Perhaps, but it really works! Coffee grounds and hot water with dish soap mechanically help scrub greasy buildup out of pipes. Coffee acts here like a gentle scrub, which helps keep the drain clean without resorting to irritating chemicals.
We get the feeling that this is one of those tricks that make you smile once you see how simple they are. Before you enthusiastically grab a mug, however, we should clarify one thing—with this method, the devil is in the details. Coffee is a great home helper, but it requires precision and a bit of common sense so that instead of clean pipes, you don’t end up with an emergency visit from a plumber.
How to Safely Clean Pipes with Coffee?
The main rule? Use coffee grounds for this purpose in high moderation and always combined with a huge amount of hot water and fat-dissolving detergent—such as ordinary dish soap. Why is this so important? Coffee itself is heavy and doesn’t dissolve in water. Thrown in dry, it will simply sink to the bottom of the P-trap and solidify into a hard mass. The situation is completely different when you mix it with dish soap and rinse it with a healthy stream of water at about 60–80°C. Then the particles slide smoothly, gently scraping the greasy film off the pipe walls.
By the way, we must raise a big red flag here and warn you about one thing. Never pour large amounts of grounds at once, especially into already clogged pipes! If water is barely draining, adding coffee there will immediately cause a compact, hard-to-clear blockage. Seriously, you can only make the situation worse this way. Even American experts, in their official recommendations on disposing of coffee grounds and fat in sewage systems prepared by the EPA, point out that thoughtless waste disposal of this type can increase the risk of a clogged drain by 20 to even 40 percent. Dosing with moderation is an absolute must!
Here is a quick summary of this method on instructions:
- Best for: Removing greasy buildup and neutralizing drain odors
- Cost: $0
- Difficulty: Medium
Nobody likes a clogged sink, so treat this method purely as a preventative, weekly refresh. If the pipes are already completely blocked, put the coffee cups aside and reach for a classic plumbing snake or call a professional. Coffee is meant to make our lives easier, not add to our chores!
10. Scented Upcycled Soy Candles
Who among us doesn’t love the smell of morning coffee? Exactly! What if we could capture this wonderful aroma for longer and create something truly cozy? We feel like nothing boosts the mood on a chilly afternoon like a warm, dancing flame. By the way, combining eco-friendly plant wax with coffee grounds is a brilliant way to do some home crafting.
Adding dry grounds to soy wax yields a beautiful coffee scent while burning. The whole thing looks absolutely stunning—the dark grounds gently settling to the bottom create a rustic, layered pattern. Interestingly, soy wax melts at a lower temperature than classic paraffin and burns up to 50% longer, which is mentioned in places like the DIY guide on Bonami.pl. It’s a great, zero-waste patent for creating a tiny work of art.

- Best for: Creating an aromatic DIY candle for home or gifting
- Cost: Low (wax and wick needed)
- Difficulty: Hard
How to Create Your Own Coffee Candle Step-by-Step
Let’s do it together! Although the project requires focus and precision, the end result is well worth it. Prepare a jar (e.g., an old jam jar), soy wax flakes, a cotton wick with a metal base, and most importantly: dry coffee grounds. Remember, the grounds must be perfectly, even excessively dry. Avoid using wet grounds, as water will prevent the candle from burning properly and may cause the wax to crackle dangerously.
We start by melting the wax in a double boiler. Pour the flakes into a heat-resistant bowl and place it in a pot of gently simmering water. Keep an eye on the temperature—it’s best for it to hover between 75–85°C. Once the wax has completely turned into a clear liquid, remove it from the heat and let it rest for a moment. When the temperature drops to about 65°C, throw in the grounds (a small teaspoon is enough, i.e., approx. 3–5 g per 100 g of wax) and stir slowly to let the mind-blowing aroma start releasing.
Now it’s time for assembly. Stick the wick base to the bottom of the jar with a drop of hot glue or a bit of wax, and secure its upper part with a wooden skewer to keep it from slipping sideways. Slowly, in a steady stream, pour the cooled wax (approx. 55°C) into the container. Leave about a centimeter of free space at the top. Now for the hardest part: leave the candle for at least 48 hours to solidify properly. On the first burn, let it burn long enough for the wax to melt all the way to the sides of the jar—this will prevent ugly tunneling!
How to Choose the Best Method for Your Coffee Grounds?
Did you know that the average person throws away a massive amount of coffee and grounds every year? Seriously, that’s so much wasted potential! We feel like these unassuming, dark particles are actually a free ticket to a more eco-friendly life. No worries—we are not here to lecture you or force you into drastic changes. For us, it’s strictly about the pure joy of simple solutions that are easy to implement right away.
Wondering which method will be best for you? It all depends on your daily habits and what you enjoy doing most in your free time. We’ve put together a quick guide to make your decision easier without diving into complex theories.
Green Thumbs: The Garden Lovers’ Version
Is greenery your passion? If you spend every free moment tending to plants on your balcony or in the garden, coffee grounds will be a hit. Choose the fertilizer and natural repellent options to help you care for your plant kingdom without reaching for chemicals.
- Eco-friendly fertilizer: Coffee is rich in nitrogen, phosphorus, and magnesium. According to Deccoria.pl, regularly scattering the grinds under acid-loving shrubs, such as blueberries or hydrangeas, significantly improves their condition and boosts growth. You can also dissolve a cup of grounds in 10 liters of water to water your indoor plants after a week. Remember, however, to avoid using them on cacti or lavender – they definitely prefer alkaline soils!
- A way to repel mosquitoes and wasps: Fed up with annoying insects during your evening relaxation on the terrace? Dry the grounds and gently burn them in a safe, heatproof container. The rising smoke will effectively repel pests. By the way, if you add a bit of dried sage or lavender, you’ll get an even better effect thanks to the essential oils they contain.
A Moment of Relaxation: The Home Spa
Or maybe after work, you prefer to hide away in the bathroom and forget about the rest of the world? If you love skincare rituals, go for the homemade coffee scrub. It’s probably the easiest method for smooth skin without spending a fortune in drugstores.
- Body scrub: Turn your grounds into a nourishing cosmetic by combining them with sugar, sea salt, and a bit of coconut oil. Doing such a massage in the bath brilliantly improves microcirculation, softens the skin, and works as an anti-cellulite treatment.
- Scalp treatment: In the mood for a quick refresh? Use damp grounds for a gentle, 5-minute scalp massage before washing your hair. Caffeine stimulates roots to grow and excellently cleanses styler residue.
A Clean Home, Eco-Style
Don’t have a garden or the patience for homemade skincare? No problem! If you care about a fresh and eco-friendly home, coffee grounds will serve perfectly as a natural helper in daily cleaning.
- Natural odor absorber: Place dried coffee grounds in a small bowl or cheesecloth and tuck it into the fridge, shoe drawer, or closet. Coffee has an outstanding ability to neutralize unpleasant aromas. Isn’t that a brilliant alternative to chemical air fresheners from the supermarket?
Next Steps: How to Start Collecting and Storing Coffee Grounds?
Just finished drinking your morning coffee? Great! Don’t throw away what’s left at the bottom of the filter or moka pot. Seriously, let’s start collecting coffee grounds today. They are an absolutely free resource that can work wonders in our home. We get the impression that the first step is always the hardest—changing the habit. Instead of automatically reaching for the trash can, place a small bowl next to your coffee machine. For a start, we suggest a simple test: let’s create a quick odor absorber for the fridge or try out the great hack for removing smelly shoe odors described by Urządzamy editors. You’ll see how incredible the power of these inconspicuous dark particles is!
Before we run off to battle, though, we must mention one little catch. Coffee loves moisture, and from there it’s just a short step to an uninvited guest: mold. Surely none of us want to grow a new ecosystem in a jar, right? That’s why the smoothest path to success is thoroughly and very carefully drying our coffee base. Essential step—damp grounds left enclosed will spoil faster than you can brew another espresso.
Step-by-Step Guide: Preparing Your Coffee Base
The entire preparation process is incredibly simple and requires no specialized equipment. By the way, the aroma wafting through the whole house during drying is simply divine! Here is how to do it efficiently:
- Collecting grounds: After each brew, place the grounds into a clean, open container. Don’t keep them there for too long though—it’s best to dry them the same day, while they are still relatively fresh, so they don’t have time to absorb moisture.
- Drying on paper or in the oven: Spread the grounds in a thin layer on a sheet of baking paper and leave them in a dry, airy place for a day or two. If you’re pressed for time, slide the tray into a slightly preheated oven (about 50 degrees Celsius) with the door slightly ajar. The grounds must become completely loose like dry sand.
- Airtight storage in a jar: Once you are sure that there is not a single drop of water left in the coffee powder, transfer it into a clean, dry jar and screw the lid on tightly. A supply prepared this way can safely sit on a shelf in a dark cupboard for many weeks.
Frequently Asked Questions (FAQ)
Which method on the list is completely free and easiest for beginners?
An instant and completely free hack is using coffee grounds as a refrigerator odor absorber. You don’t need any budget or special skills. Simply dry the remaining grounds thoroughly, pour them into a small container without a lid, and place it on a shelf. Fast, effective, and zero cost to neutralize unpleasant odors!
Can coffee grounds safely replace harsh chemical cleaners?
Absolutely! When you’re struggling with grease and heavy burnt-on stains on pots, coffee grounds act like a natural, safe cleaning scrub. Thanks to their gently abrasive texture, they remove even tough grime without needing to reach for harsh household chemicals. You save money and protect your hands.
How often should you refresh odor-absorbing coffee grounds?
Dried coffee grounds in the fridge or closet work effectively for about 1–2 weeks. After this time they lose their absorbing properties, so simply throw them away and replace them with a new, fresh batch. A quick swap guarantees continuous protection against bad smells.